How to Use the Rack Web App: Full Walkthrough
Sign in, read your history, view analytics, build routines from scratch, and import from other apps on the big screen at rackstrength.com. Plus which actions live only on the iPhone.
The Rack web app at rackstrength.com is your big-screen view: better for reading your history, digging into analytics, and building routines than the phone. This guide covers every core action, plus the two things that live only on the iPhone. About 6 minutes.
Before You Start
- You need a Rack account first. Accounts are created in the free Rack iPhone appthe first time you sign in there — the web app only signs you into an existing one. If you haven’t installed the phone app and signed in at least once, do that first, then come back. (You don’t need the iPhone to use the web app afterward, only to create the account.)
- Most of this is free.Signing in, reading history, building routines, and importing all work on a free account. If a section ever looks locked, you’ll see an upgrade prompt — that’s Rack Pro, not a bug.
One thing the web app does not do: log live workouts.You record and confirm sets on your iPhone or Garmin watch. The web app is for reviewing, analyzing, building routines, and importing. There’s no “Start Workout” button here, and that’s by design.
1. Sign In
Go to rackstrength.com and click Continue with Google, Continue with Apple, or Continue with Strava. Rack has no email-and-password login — you always sign in through one of these three providers (this is called “OAuth,” meaning you log in with an account you already have).
Empty after signing in? You picked the wrong button. Your data is tied to the provider you first signed up with. If you created your account with Apple on your phone but click Googlehere, you’ll land in a new, empty account — not a broken one. Sign out and sign back in with the same provider you used on your phone, and your workouts, routines, and PRs (personal records) appear.

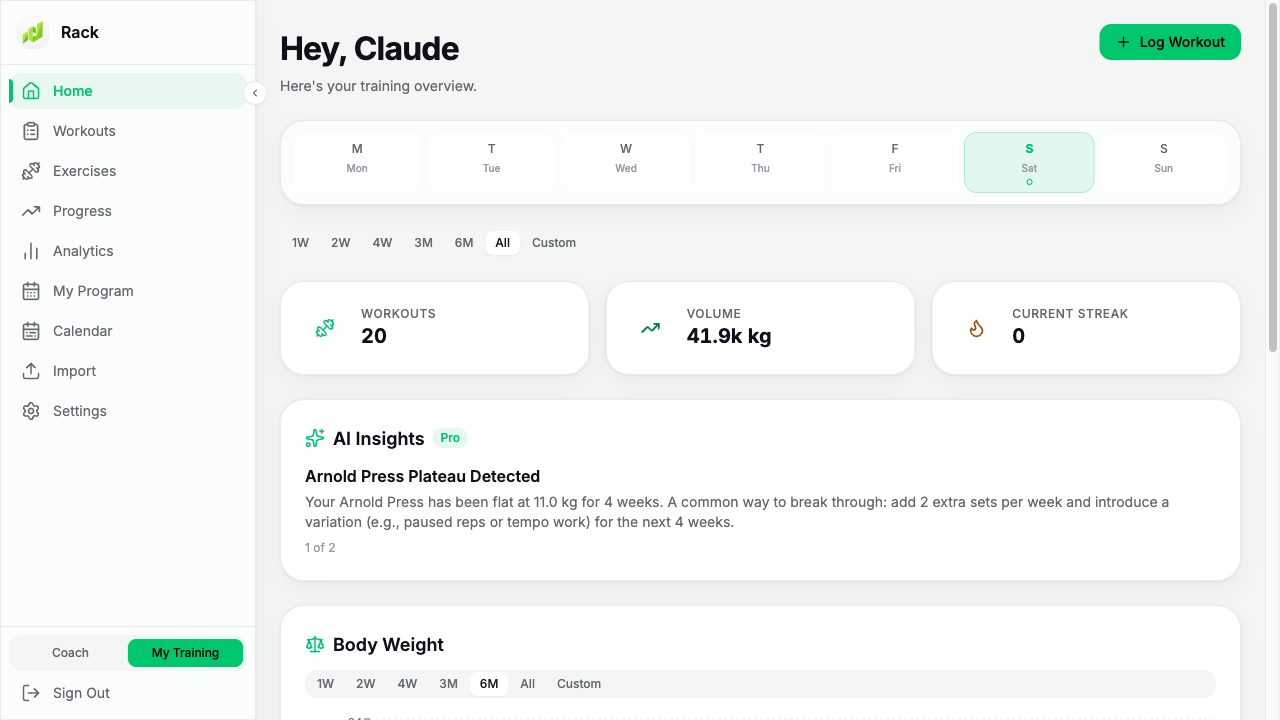
2. Find Your Way Around
The left sidebar is your navigation: Home, Workouts, Exercises, Progress, Analytics, My Program, Calendar, Import, and Settings. Everything below hangs off these.
3. Read Your History
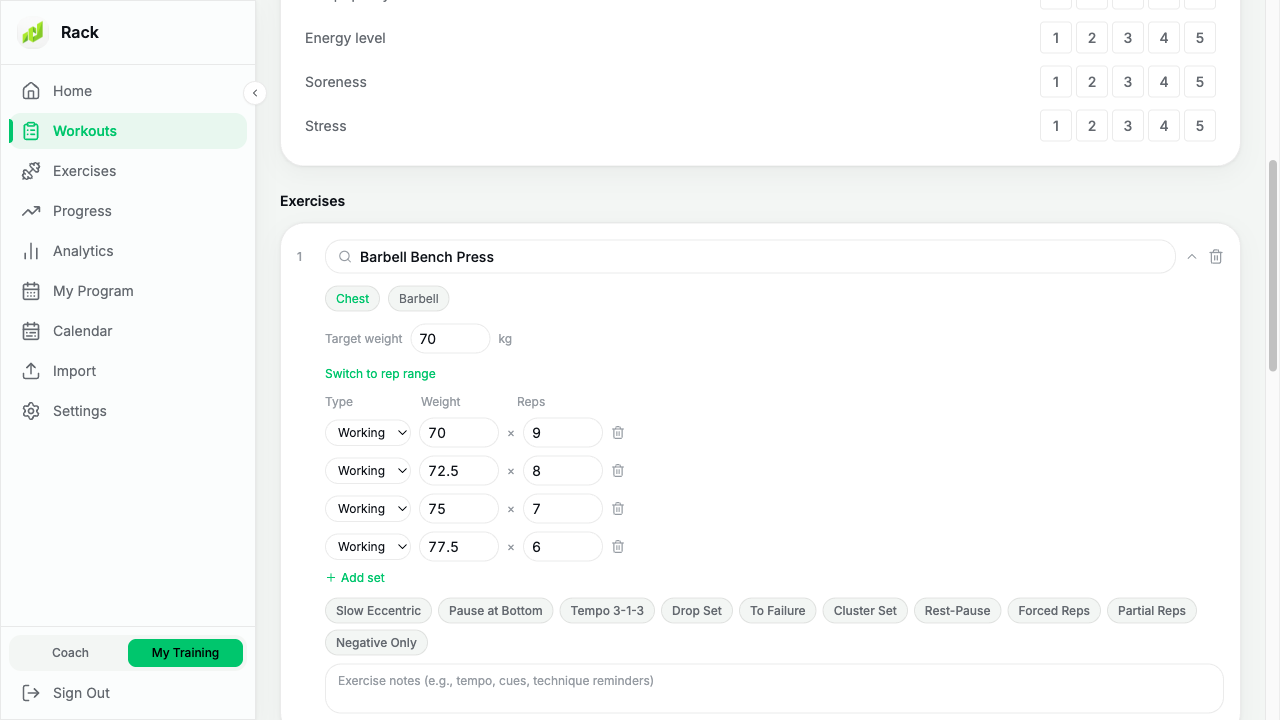
Open Workouts to see every session. Click any workout to drill into per-set weight, reps, and RPE(how hard each set felt, on a 1–10 scale), along with the Garmin heart-rate data captured during the session.
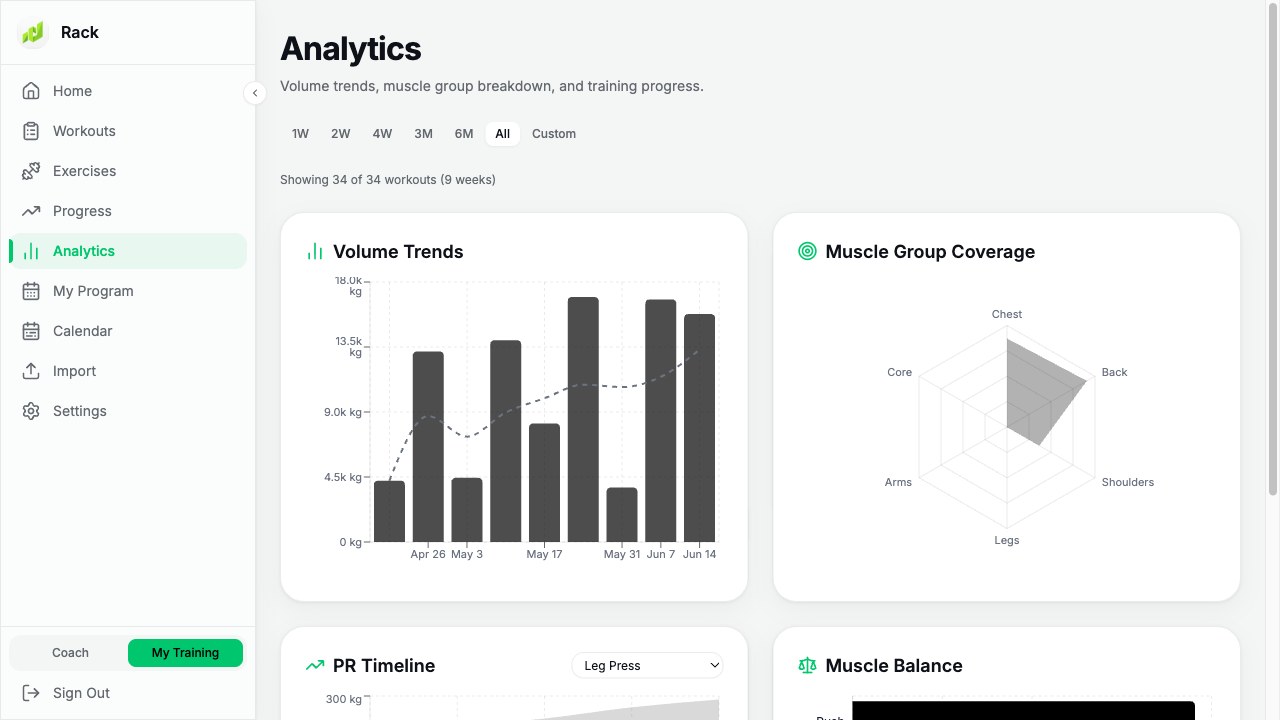
4. See Your Analytics
Progress and Analytics are where the big screen earns its keep: PR (personal-record) timelines, volume trends, body-weight charts, and muscle balance are all far easier to read here than on the phone.
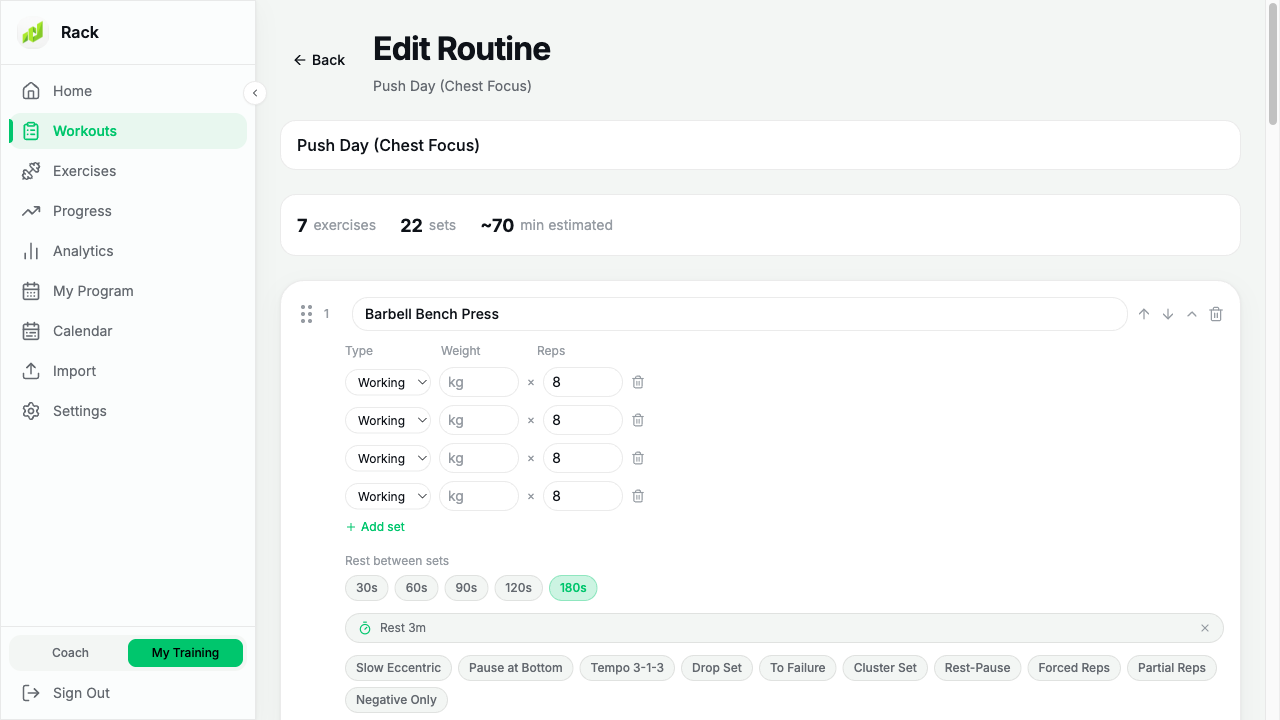
5. Build a Routine From Scratch
Open My Program (or Workouts) and click New Routine. Give it a name, click Add Exercise to search and add each movement, then set the target sets, and the reps and weight per set. To pair two exercises as a superset (done back-to-back with no rest between), group them together, then set your rest and click Save. Saved routines sync automatically to your iPhone and Garmin watch, so you can build on the big screen and train from your wrist. New to this? See Create Your First Routine for a step-by-step walkthrough.
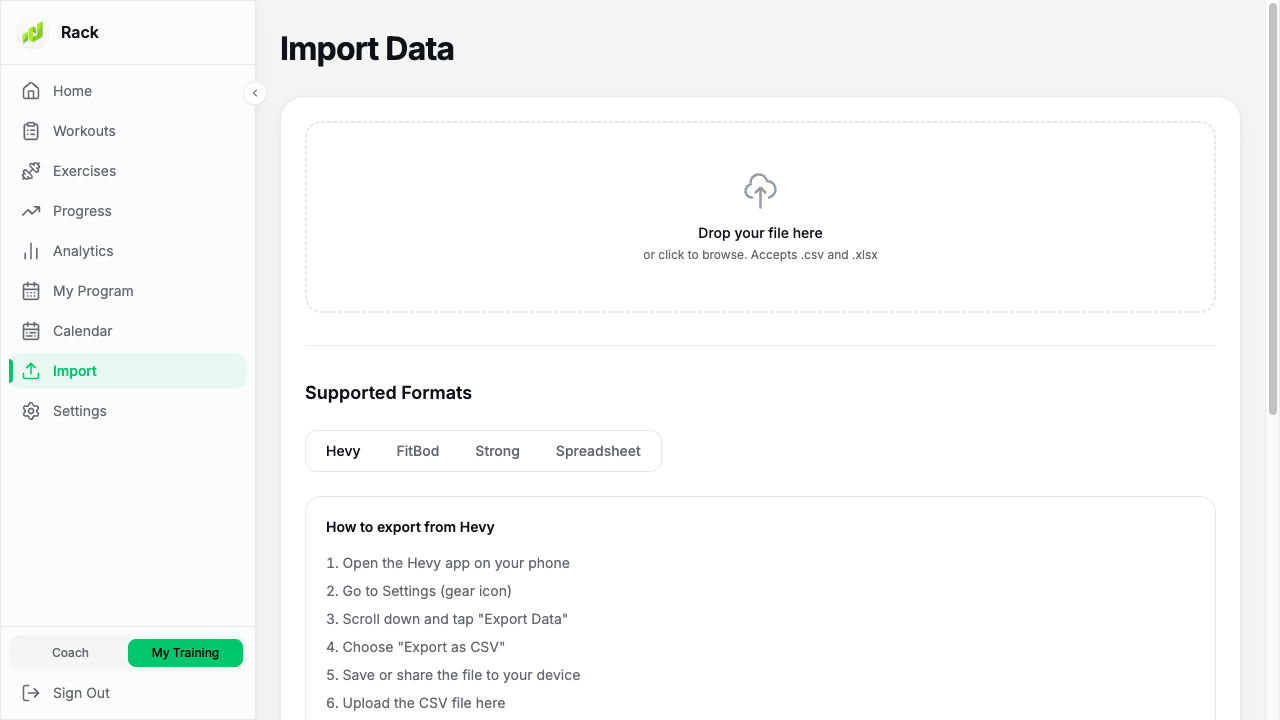
6. Import Your History
First export your history from the other app (Hevy, Strong, and Fitbod each have an export option in their settings). Then open Import, choose the matching format (or let Rack auto-detect it), and upload the file. Your imported sessions show up alongside everything else in Workouts and Progress.
Upload rejected?The file is usually still zipped or is the wrong export — unzip it (or re-export from the other app) and try again. Still stuck? Email us the file.
Two Things That Live on the iPhone
A couple of actions are iOS-only by design, so you won’t find them on the web:
- Turning a past workout into a routine.The “Add to Routines” action lives on the iPhone — long-press a workout on the Progress tab in the iOS app to save it as a template. See the Rack iOS App guide, step 3.
- Exporting your data. CSV and XLSX export live in the iOS app under Settings → Sync & Backup → Data & Export. See the Rack iOS App guide, step 7.
A Note on Units
The web app has no unit toggle of its own. It follows the Weight Unit you set on your iPhone (Settings → Preferences), so change it there and the web view matches.
Still Stuck?
Email support@rackstrength.comand we’ll help you sort it out.